
Product finders are a type of locator that includes the tracking of a list of products for each location. Users can search by a combination of location and product to produce results that show only locations near their search term that stock the requested product. MetaLocator is especially well-suited to support this type of locator.
There are a few variations of a product finder. In this example, we'll be exploring a use case where the following conditions are met:
We have a variable inventory from location to location
Products include a UPC, SKU or similar unique identifier
Products may also include a name, price, description or similar details
Our customers can also create category-based product finders, where the notion of a product is handled by our category system. That simpler method is recommended when the locator doesn't require product details like categories, descriptions, or SKU numbers.
Getting Started
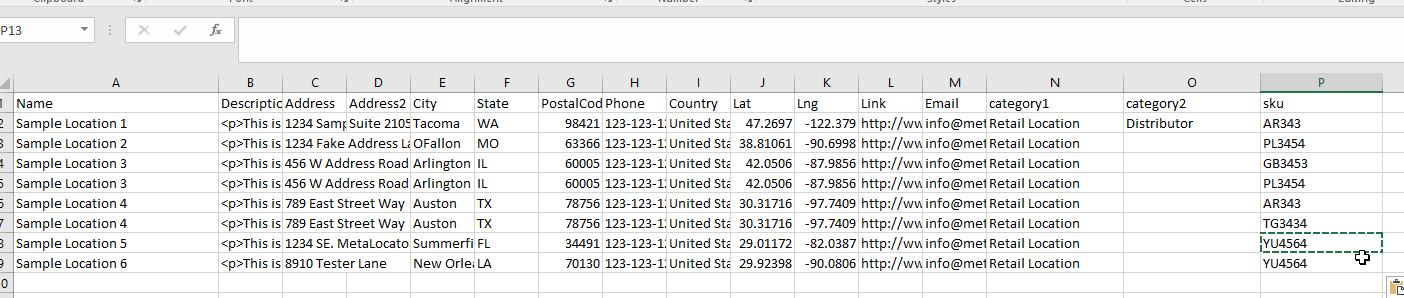
Our first objective will be to properly structure an import data file that includes both locations and products. This approach is one of a few methods of importing this data, but it's the most common. In this example, we will create a single data file that includes both location and product data by repeating the location row for each product stocked by that location. We will also create a product data file that includes all information for our products.
Importing Products
The first step is to create a data file that includes your product information. Your columns and information may vary, but the minimum information is a SKU field and a Name field as shown below:

The SKU should uniquely identify the product. The SKU should never repeat in this file. Each row should represent a single product. SKU is an example of an External Key. This External Key is included by default in new tables. If your unique product identifier is something different, like UPC, you can re-name the SKU field as needed by clicking Fields, choosing the product table and editing the SKU field. More information on External Keys can be found here.
Now we can import the products list shown above by clicking Products > Import:

In our example, the columns were all recognized as shown below. Click Next, then "Add" on the import options screen:

Importing Locations and Products
With our product data imported, we can now import locations and the products they carry in a single file. The file includes our location information in the usual columns, but also includes the SKU column. When a location carries more than one product, the location row is repeated. In this file, each row represents the unique combination of location and product.
Import this data by choosing Data > Import, choose the Locations table in this step. In the Match Columns step, SKU will appear as an unknown field. Select "Products" in the Destination table drop-down as shown here:

Choose Update Existing and Insert New on the following Choose Options screen.
Displaying Related Products
At this point, we have location data, product data and per-location inventory data but we need to display it in the back-end and the front end. The first step here is to create a special field in the locations table that displays related products.
Under Fields, choose the Locations table, and click New. Under Field Type, choose Related Table Link, and set the Related Table to products as shown here:

Once this field is created, you can see and manage the products related to a given location under Data > All Records. (Choose Locations as the active table), then edit any location by clicking the location name. Notice the new tab, Products at this Location as shown here:

Creating the Product Finder Interface
Showing the Products in the Search Form
At this point, we have all fields and data present in the system that are required to support a product finder interface. Create a new interface by clicking Interfaces, then New. In this example, we will choose the Rich Media. Before any modifications are made, we have a functional locator, but it doesn't allow use to search by product or see what products are available at a given location.

We will add a product drop-down list by updating the Search Form > Add Field to include the SKU drop-down as shown here:

We can then change the label to read "Products":

Following this Tutorial and adding LOCATOR_SKU as the Label will help translating between languages for multi-language interfaces.
Showing Available Products in the Location Results
Once a user performs a search, it may be helpful to display the products available at that location directly in the results. We can do this by adding the "Products at this location" field to the template where we'd like the data to display. In this example, we'll add that to the map marker window by editing the Map Popup Template.

Now, when viewing the locator, you can see the products available in the map popup as shown here:

This concludes this tutorial. If you have additional questions on how to set up a product finder, contact our HelpDesk.